 With over one billion active users on Facebook, most everyone recognizes the importance of having a presence for their photography business on the platform. However, creating an account, publishing some information, and then forgetting it entirely isn’t enough to book you more clients or engage with your current ones. In this article, we’ll walk you through how to set up a professional business page, what you need to know about Facebook to be successful, and what to post to establish yourself as a relevant professional photographer and improve your marketing.
Before we give you the step-by-step guide for setting up your page, we want to be sure you understand why a page is important. While it might seem easier to use your personal timeline for your photography business, you’ll be grossly disadvantaged if you do this. Here’s why:
- Your personal profile should be just that—personal. There may be details you choose to share with your Facebook friends that you wouldn’t necessarily want your potential clients to read.
- You’re limited to 5000 friends. While 5000 fans for your business might seem a long way off, dream big! Creating an official Facebook page means that you can continue to grow your followers list without having to choose who to remove when you near that 5000 mark!
- There are options available to pages that you don’t have access to with your personal profile. These include analytics, reviews, and advertisements—again, you might not be thinking too much about these now, but allow yourself the options down the road!
Have we convinced you that a page is the way to go? In the next section, we’ll walk you through what you should be including when you initially set up your page. If you already have a page set up, read the following tips and verify that your current page is ready for use!
- While logged into your personal Facebook account, select “Create Page” under “Pages” on the left-hand sidebar.
- If you have a photography studio, register as a “Local Business or Place” (with the sub-category “Professional Services”) and enter your business’s information. If you work from home, this option isn’t recommended for privacy reasons; you can instead register as a “Company, Organization, or Institution” (sub-category “Small Business”).
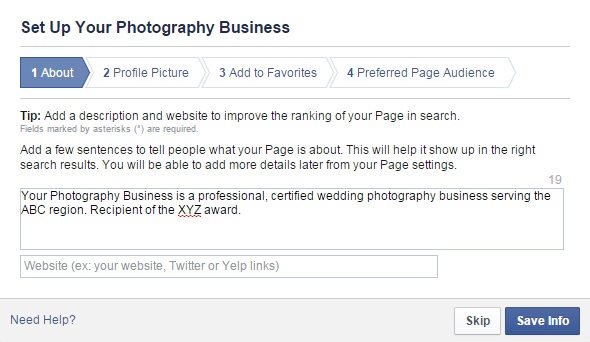
- The “About” section is important—not only because potential clients will get an idea of who you are and how your business operates from it, but because the wording you use can improve your search ranking. You’re limited to 155 characters, so you’ll have to keep it short and sweet. You can see an example in the image below.
- You have a couple of options for your profile photo, which must be at least 180 x 180 pixels and will be resized to be square. You can use your photography business logo, but if it is primarily text, it will be illegible as a thumbnail on your posts. A better option is to set your profile picture to a professional photo of you—allow your clients to see who they would be hiring from the start! Save images from your portfolio for your cover photo and your albums.
- When selecting your preferred audience for your page, enter the location where you primarily work. Select the age you target with your photography business (for senior portrait photographers, this could be teens through parents’ ages, etc.).
- Once your page has been published, you can select “About” and “Settings” to edit various aspects of your page. Enter your contact information, website, and a long description for your business under “About.” The “Settings” tab will allow you to set filters for content posted to your page and choose your notification settings.
- Add a cover photo to your page—this is the time to show off your best work! The image you select should be at least 851 x 315 pixels. Your cover photo will only be visible to those who have chosen to visit your page; you know they’re interested in your work. You can choose one photo or create a collage of your favorite portfolio images for display.
- Create a photo album to act as your portfolio—include images from a variety of sessions, but be sure to watermark each of them!
- Once you have your settings and images as you would like them, invite your Facebook friends to like your page. Your goal is not to invite those who have zero interest in your services, but it does add some respectability to a photography business page to have a solid number of followers. Also, once you have reached 25 followers, you can select a custom Facebook URL for your page under the “About” tab—do this as soon as you have the necessary followers to reserve your link!
Take a deep breath—the set-up is complete! You’ll make edits here and there, of course, but at this point you can begin inviting friends and past clients (who you can encourage to post a review of your services to your brand new page)! Don’t forget this is not only an opportunity to book more clients and increase referrals, but also to reconnect with current customers. There are a few nuances to using Facebook as a page that we want you to be aware of before you begin posting regularly.
The first thing to understand is that not all of your followers will see your posts in their newsfeed. They just won’t. Facebook is slowly gravitating toward requiring payment for practically any post to reach a large portion of your followers (this is what the “Boost Post” button on each post you make is all about). Don’t be disappointed if you see limited reach (how many people see your post) or engagement (likes, comments, and shares) early on.

The above link was one that we shared–as you can see, it only reached a couple hundred of our 35,000+ followers. This could be due to the time of the post, the content, or Facebook’s settings, but we’re offered the option to “Boost Post” if we would like it to appear in more news feeds.
Secondly, when people engage with your posts, they’re more likely to see your posts in the future. Liking, commenting, or sharing something that you have published suggests that they’re interested in your content and Facebook wants to be sure its users see personalized content in their news feeds.
Lastly, using Facebook as a page should look very different from using it for your personal profile. Don’t think of it as an extension of your personal profile; your posting should be deliberate and you should be providing value to your current and potential clients each time you post as part of your photography marketing strategy (go back and read the “6 Qualities of Strong Social Media Content” post from a few weeks back if you have yet to do so).
Ready to begin? Of course you are! With the right page set-up and an understanding of Facebook pages, you’re all set to begin posting. We recommend consistently posting once per day, at least during the week—consider when your audience is likely online (statistics show that this is typically between 6 and 8 A.M. on week days for Facebook users), but feel free to experiment with posting times to see what works best. Also experiment with the types of post that you create (links, videos, photos, plain text, etc.). In our experience, links to articles with a short caption (the shorter the better!) see the highest engagement, but vary your postings and make a note of the results.
As a professional photographer, you have the benefit of being a local business—you can share location-specific articles and updates that your target audience will find interesting. We’ve seen small businesses be successful with even minor updates like a screen shot of the day’s weather forecast with a short note such as “It’s a beautiful day here in L.A.! Are you outside soaking up the sun?” These location-specific posts remind your viewers that you’re in their area and let them know that you care about your community and those who live in it. As an added bonus, people love to engage in conversations about topics they’re familiar with—ask a question about their city and they’re more likely to engage, which means they’re more likely to see future posts from your page!
While it may be tempting to make 90% of your daily posts in the form of images you have taken, fight the urge. Your followers have liked your page because they recognize your talent; now your job is to show them your personality and your ability to interact with them in their everyday lives. When you do share an image from a session, be sure to include a caption with keywords (like those you used in your page’s description).
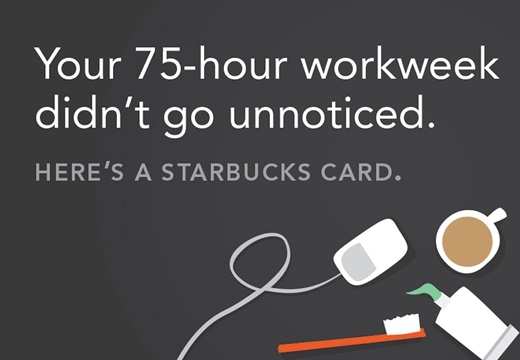
Every now and then, consider doing a contest to increase your page’s engagement—this can be as simple as offering a $5 Starbucks e-card on a dreary day to the first person who can guess the number of jellybeans in a photo you post. We recommend offering small prizes that don’t break the bank, but that are not in the form of photography—we want your work to be viewed as valuable and not something you’re willing to give away for a right answer to a trivia question.
Overall, we want you to view your Facebook page not as a way to make your job as a photographer more convenient necessarily, but as a way to connect and engage with customers past, present, and future. If you’re regularly engaging them with interesting and relevant posts, then when you throw that “right hook” that we mentioned a few weeks ago (in the form of posting about your current package special or scheduled mini sessions), you’ll have developed a rapport with your followers. They’ll know that hiring you will lead to a positive and enjoyable experience, because that’s the professional photographer that they’ve gotten to “know” through Facebook!
Finally, engagement with those who post to your page is crucial. It’s fantastic to share a great article and have 50 comments posted from followers, but if you don’t respond to a single one of them then you don’t look particularly interested in their thoughts. When someone takes the time to post to your page, at least click the “like” button on their comment (if it’s a positive one). If the post opens the door to a discussion, continue the dialogue! Ask them to elaborate; tell them what a great point they have made; add your personal thoughts into the mix.
If you read the last social media blog post about “How to Create A Social Media Plan,” you should have decided upon a voice that you’ll use for your social media efforts—be consistent in how you engage. The exception for continuing a conversation on your Facebook page is if an angry client creates a post—it is perfectly acceptable to relocate the conversation to a more private setting. Simply comment something like “I’m so sorry you feel that way! Please check your email for a message from me; I’d like to talk to you about this more.” This way, your other followers can see that you value customer service and were willing to work toward a resolution